Learnings of my latest project, Traker
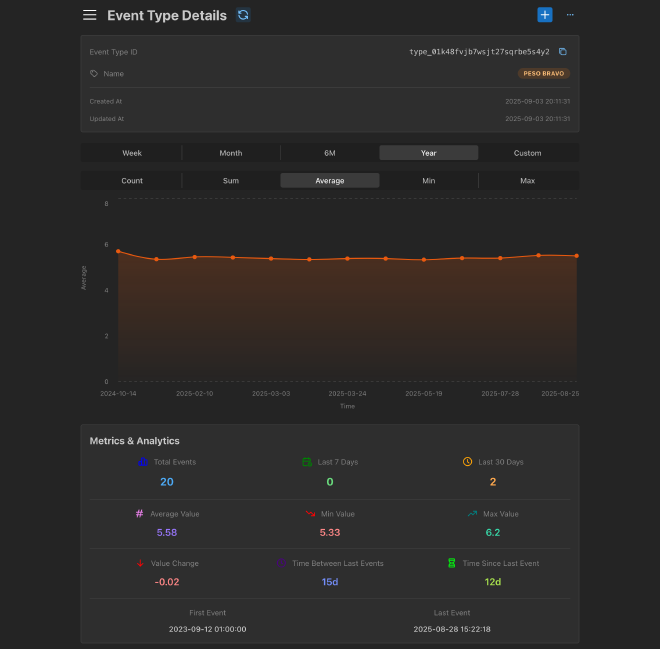
Table of Contents
I recently completed a personal project called Traker, a tool for tracking various personal metrics and events. Building Traker was a great learning experience, and I wanted to share some of the key takeaways from the project.
Everything started in October of 2024, when I decided to build a tool to track events in my life. I wanted something simple, flexible, and easy to use. I considered building a Flutter mobile app but wanted to avoid the app store submission process. So I decided to go with the Progressive Web App route, which would allow me to have a mobile-like experience with instant updates and no need for app store approvals.
At the time I picked the following tech stack:
- Frontend: Next.js with React and TypeScript, using Material UI for components to create a mobile-familiar experience.
- Backend: Next.js server actions with Pocketbase for user authentication and data storage.
The reason I went with Next.js is that I wanted to have a full-stack framework that would allow me to build both the frontend and backend in one place. I also wanted to use React and TypeScript, as I am comfortable with these technologies.
For the backend I picked Pocketbase because it is a lightweight, self-hosted backend that provides a simple way to manage users and data. It also has a built-in admin panel, which made it easy to manage the data. I know there’s Supabase, but at the time I wanted to try something different and wanted to own my data.
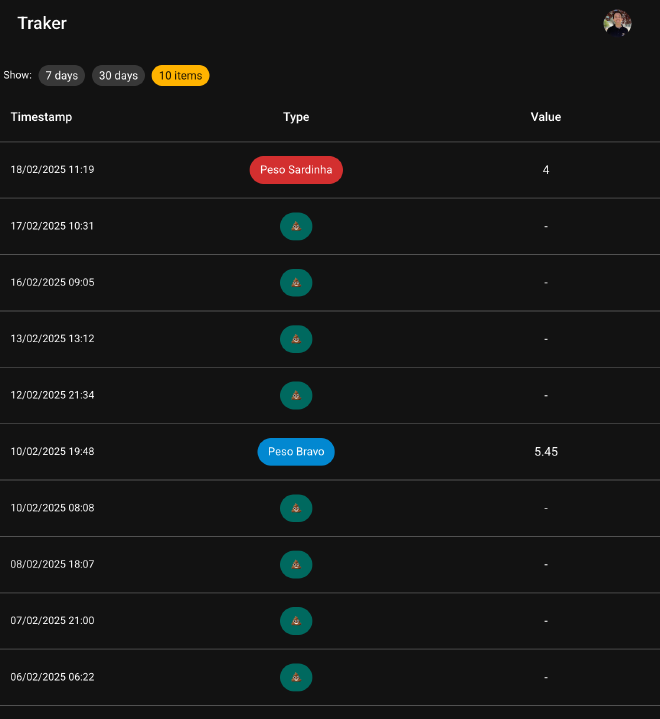
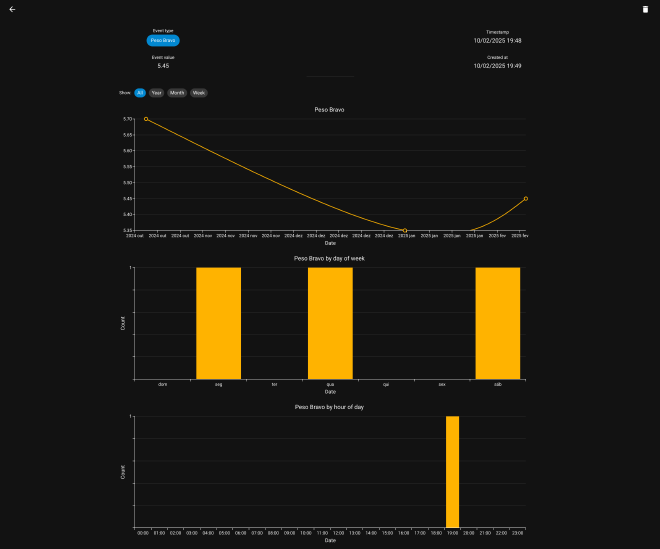
I got the app up and running with some core features:
- Google authentication
- Creating events and event types
- Delete events (only one at a time)
- Infinite scrolling for events
- Graphs for event types: showing how the value of an event type changes over time and its frequency
Despite the web app being functional, I always felt that it was missing something. The performance was not as good as I wanted, and the user experience could be improved.
For example, users could not update an event, they would have to delete it and create a new one. Also, many components felt clunky and not very polished. But I kept using the app and logging events.
I use this app to monitor my cats’ weight and, eventually, grew frustrated with the app because of its flaws. Around one month ago, I was working on my home server and decided to try out InfluxDB, a time-series database, and Grafana, a data visualization tool, to track my cats’ weight. These are both tools that I use on my day job and I thought it would be a good opportunity to learn more about them.
After some tinkering, I was able to create an iOS shortcut that would log my cats’ weight to InfluxDB and a Grafana dashboard to visualize the data.
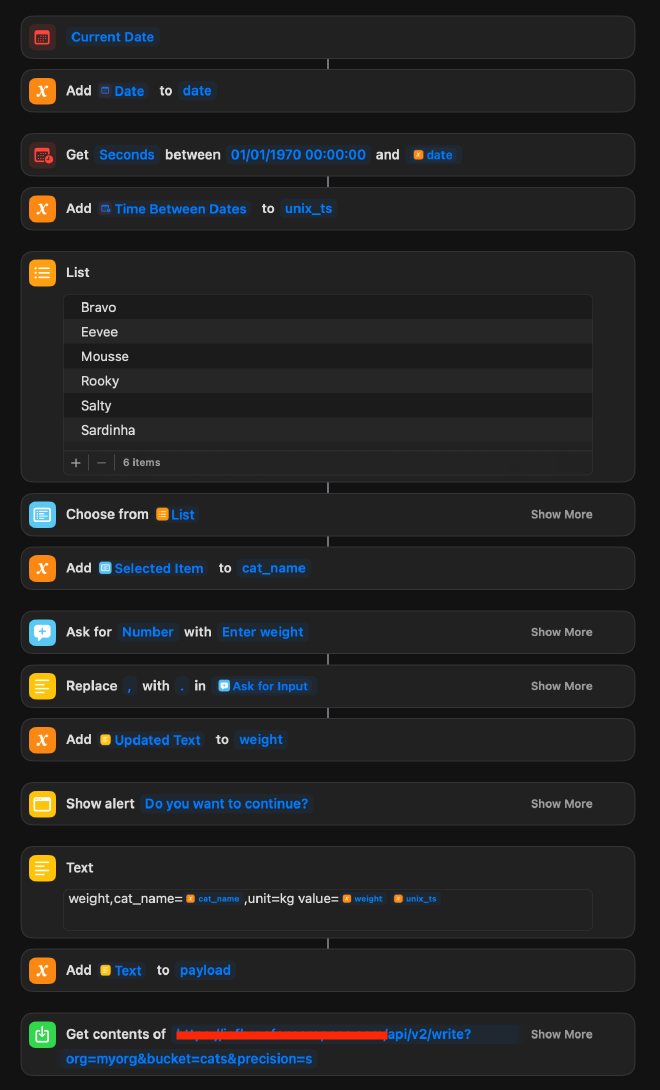
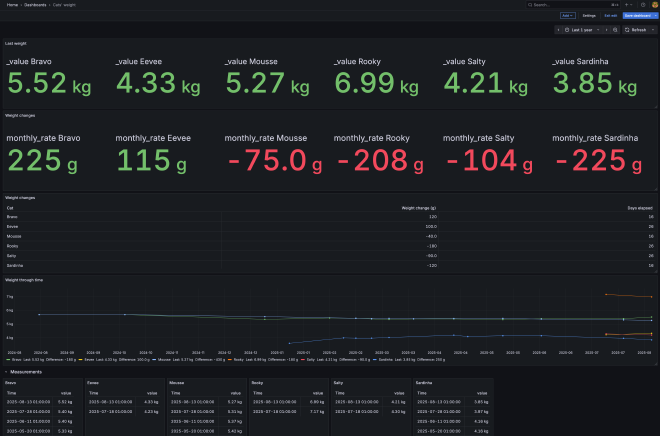
This was a fun experience, but even I could recognize that this was overkill for the simple task of logging events. 😬 However, it did make me realize something important: I wanted to build an API-first app.
API-first #
Why did I want to build an API-first app? Because I wanted to be able to use the app in different ways, not just through a web interface. I wanted to be able to log events from my phone, from my computer, and who knows, maybe even from a smartfridge.
I think the API-first approach gives freedom to the user to use the app in the way that best suits their needs. It also allows for more flexibility in terms of future development, as new interfaces can be built on top of the API. It would also be a great opportunity to learn more about building APIs and learning good practices. In my day job at Paddle, we also have an API-first mentality, so I wanted to apply the same principles to Traker.
Thus I decided to rebuild Traker from scratch, this time with an API-first approach.
I decided to keep using Next.js, as it allows me to build both the frontend and the backend (the API) in one place. At the time, I investigated a lot about whether I should use API routes or server actions. Initially I thought I’d use both. I would offer a REST API with API routes and use server actions for the frontend. I thought I would create some classes to manipulate the data and both the API routes and the server actions would reuse these classes, this way I wouldn’t have a lot of duplication.
However, after working on it a bit and some more research, I decided to discard the server actions approach. I realized that server actions are not really meant to be used as a full-fledged API, they are more of a way to handle form submissions and other small interactions. My code was becoming more complex than it needed to be and I was duplicating a lot of code between the API routes and the server actions. Also, in reality, server actions do implement a REST API that Next.js uses under the hood. I also think that API routes are more future proof, as they can be easily migrated to a different backend if needed.
A good API is something that developers can use without having to read a lot of documentation. It should be intuitive and easy to use. I wanted to build an API that I would be proud of, something that I would want to use myself. Is my API perfect? No, but I think it’s a good start. Did I struggle when implementing pagination? Yes, a lot. Did I use the Paddle API as a reference? Yes, of course! 🚣
I learned a lot about building good APIs which I will apply to future projects and my day job. You can check Traker’s API documentation here.
Self-hosted vs SaaS, Vendor lock-in vs Control #
Another important decision I had to make was whether to keep using the same Pocketbase instance I was self-hosting or switch for something different.
I had a couple of options:
-
Keep using the same Pocketbase instance. It had no issues. It already had all the data and I wouldn’t have to migrate anything. (I am/was the only user, so migration wouldn’t be complex). However, I would be responsible for maintaining the instance, keeping it up-to-date and available. I would also be limited by the features that Pocketbase offers.
-
Use PocketHost, a SaaS that offers Pocketbase as a service. This would take away the maintenance burden and it offers a free plan. However, I would be dependent on a third party and I would have to trust them with my data. PS: I actually recently migrated QReate.dev, a personal project to create QR codes, from a self-hosted Pocketbase instance to PocketHost and the experience has been great. The migration was seamless and I didn’t have to change anything in my code.
-
Use a different backend, such as Supabase. This would give me more control over the data and they use a Postgres database, which is a more robust and scalable solution. Supabase also has an authentication system, which would save me some time. They also offer a free plan, which is good for a personal project. However, I already have some projects on Supabase and, although I understand why, I don’t like receiving emails from time to time saying that my project will be paused because of inactivity. 😑
I’m a big fan of ThePrimagen, a streamer, Youtuber, and ex-Netflix engineer, who advocates for NeonDB, a serverless Postgres database. I never tried NeonDB before, so I decided to give it a try. They have a free plan that offers DB branching, which is a great feature for development. This way I can have a production database and a development one, and I can easily switch between them. This was one of the shortcomings of Supabase, as they don’t offer this feature in the free plan. Also, since NeonDB is basically a Postgres database, I should be able to migrate to something else in the future if needed.
Yes, it’s true that picking NeonDB means that I lose some quality of life features that Pocketbase/Supabase offer, such as the built-in authentication system and the admin panel, file storage, etc. But I wanted to feel free from vendor lock-in and also learn more about how to “build” these features myself.
So I decided to go with NeonDB and use Drizzle ORM to interact with the database. Drizzle is a TypeScript ORM that offers a great developer experience and has first-class support for Postgres. I chose it over Prisma because it appeared more modern and felt closer to raw SQL, which I prefer. I’d also seen concerns about Prisma’s query generation in some cases.
For the authentication system, I decided to use BetterAuth, an open-source authentication system that we can add to any project/database and works flawlessly. No hidden fees, no vendor lock-in. It’s true that it requires more work to setup than simply using Pocketbase/Supabase, but this way I’m more in control of how things work and I can easily change things if needed.
For example, if someday I lose my mind and decide to host everything in AWS myself, I can easily create a new Postgres database, migrate my data and know that my authentication system will still work.
Mantine #
For the UI library, I decided to switch from Material UI to Mantine. I usually use Mantine in my personal projects. I like its simplicity and the fact that it offers a lot of components and hooks out of the box. It also has a great theming system, which allows me to easily customize the look and feel of the app.
Since I use it a lot in my personal projects, I feel more comfortable with it and can build things faster. Maybe it lacks some components that Material UI offers, but I think it’s a good trade-off. Besides, I have fun building stuff with Mantine, and isn’t that what matters in the end (for personal projects)?
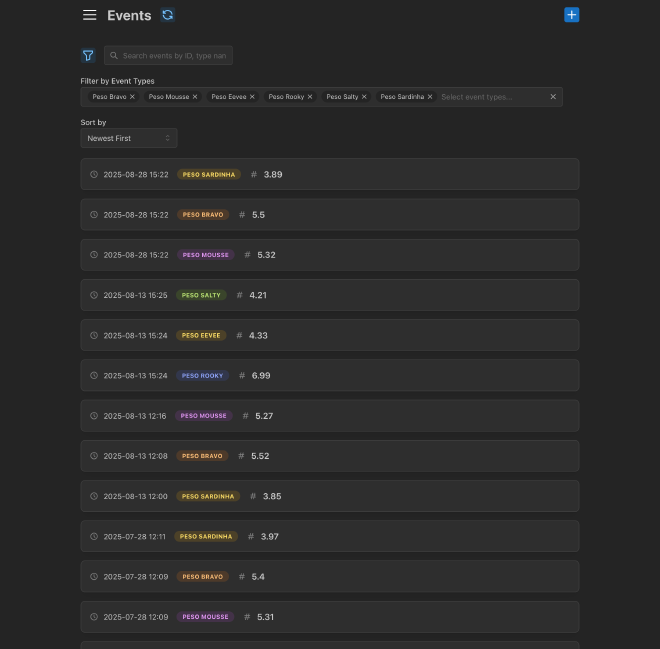
The new Traker #
So I started building the new version of Traker, this time with an API-first approach, using Next.js API routes, NeonDB with Drizzle ORM, BetterAuth for authentication and Mantine for the UI.
This time I made sure to allow users to update events, filter for event types, change the name of an event type, pick different aggregation methods for the graphs, and a lot of other small improvements that make the app more usable.
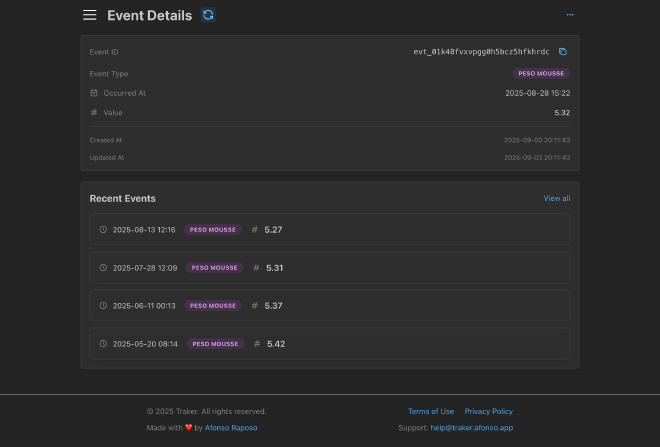
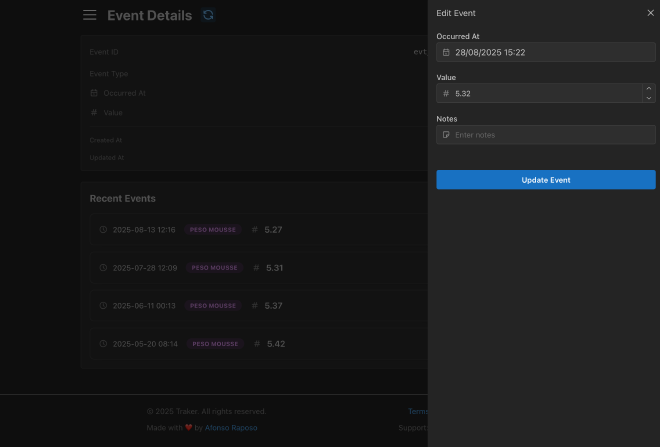
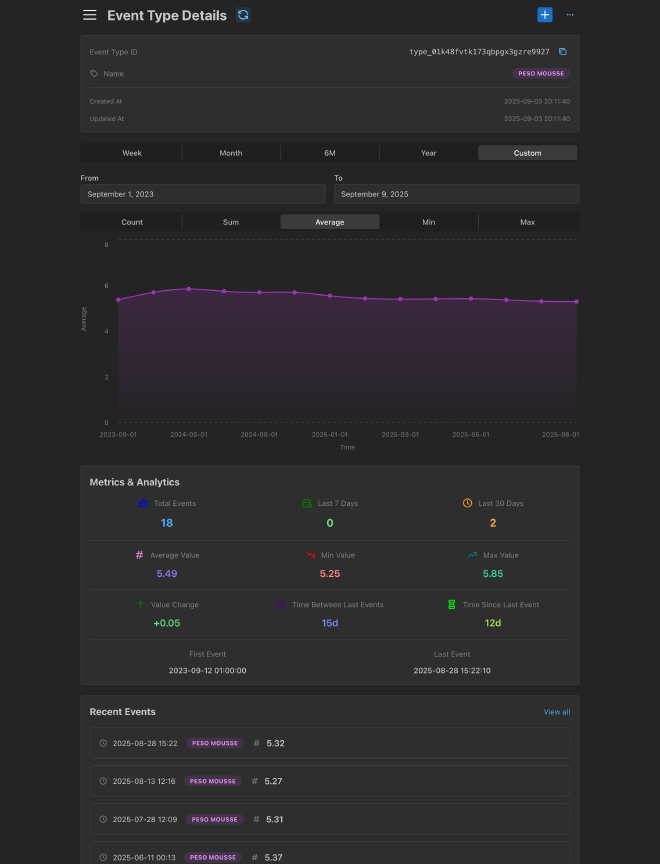
One of the improvements of this new version is the way the graphs are built. Before, the app would get all the events from the database and then build the graphs in the frontend. This was not very efficient, especially when there were a lot of events. Now, events are bucketed in the backend and only the data needed for the graphs is sent to the frontend. This makes the app much faster and more responsive. Of course, this is not a perfect solution, as the database still needs to calculate the buckets on the fly, but it’s an improvement from before.
Also, now the app is API-first, so I can easily interact without the web interface!

curl -s \
  --url 'https://traker.afonso.app/api/events?search=Peso%20Mousse&per_page=3' \
  --header "authorization: Bearer ${TOKEN}" | jq
{
  "data": [
    {
      "id": "evt_01k48fvxvpgg0h5bcz5hfkhrdc",
      "value": 5.32,
      "notes": null,
      "occurred_at": "2025-08-28T14:22:10.356Z",
      "created_at": "2025-09-03T19:11:43.474Z",
      "updated_at": "2025-09-03T19:11:43.474Z",
      "event_type": {
        "id": "type_01k48fvtk173qbpgx3gzre9927",
        "name": "Peso Mousse",
        "created_at": "2025-09-03T19:11:40.125Z",
        "updated_at": "2025-09-03T19:11:40.125Z"
      }
    },
    {
      "id": "evt_01k48fvxjw0bqjmwc2gdjf4cx0",
      "value": 5.27,
      "notes": null,
      "occurred_at": "2025-08-13T11:16:19.238Z",
      "created_at": "2025-09-03T19:11:43.193Z",
      "updated_at": "2025-09-03T19:11:43.193Z",
      "event_type": {
        "id": "type_01k48fvtk173qbpgx3gzre9927",
        "name": "Peso Mousse",
        "created_at": "2025-09-03T19:11:40.125Z",
        "updated_at": "2025-09-03T19:11:40.125Z"
      }
    },
    {
      "id": "evt_01k48fvxadms4zmszy4k830xrq",
      "value": 5.31,
      "notes": null,
      "occurred_at": "2025-07-28T11:09:41.282Z",
      "created_at": "2025-09-03T19:11:42.920Z",
      "updated_at": "2025-09-03T19:11:42.920Z",
      "event_type": {
        "id": "type_01k48fvtk173qbpgx3gzre9927",
        "name": "Peso Mousse",
        "created_at": "2025-09-03T19:11:40.125Z",
        "updated_at": "2025-09-03T19:11:40.125Z"
      }
    }
  ],
  "meta": {
    "pagination": {
      "next": "https://traker.afonso.app/api/events?search=Peso+Mousse&per_page=3&sort=-occurred_at&after=2025-07-28T11%3A09%3A41.282Z",
      "has_more": true,
      "total": 18
    },
    "request_id": "req_01k4qcp8tzx9wr5gagpeb0zj49"
  }
}
Rate limiting #
One of the challenges I faced with the API-first approach is that I needed to implement rate limiting to prevent abuse. Since the API is public, anyone can make requests to it, and I wanted to make sure that the app would not be overwhelmed with requests.
The obvious solution would be rate limiting. Since I’m using Next.js, it means that the API is serverless, so I couldn’t use a simple in-memory solution. I needed something that would work across multiple instances. I decided to try hosting my own Redis instance in my VPS but soon found out why people use managed services. 😵💫 Setting up Redis with SSL proved challenging and I didn’t want to spend too much time on it. So I decided to try Upstash, a serverless Redis service that offers a free plan, which is perfect for a personal project like this.
Setting it up was super easy with the package rate-limiter-flexible and I was able to implement rate limiting in an hour.
Now the app has two rate limits:
- a general one based on IP address that applies to all endpoints
- a more strict one based on user ID that only applies to authenticated endpoints, which are all of them 😄
afonso.app #
For hosting the app, I decided to use Vercel, as it offers a great developer experience and is the company behind Next.js. It also has a free plan that is perfect for personal projects.
I’m using Cloudflare in front of Vercel, as it offers great features for free. I don’t know how Cloudflare does it, but their “free” plan (you just need to buy the domain) is amazing!
I have the domain traker.app registered for a couple more weeks and instead of renewing it, I decided to buy afonso.app and use it as the main domain for Traker. This way I can reuse the domain for other projects in the future.
This approach lets me avoid buying new domains for every project I start, which helps with my tendency to start more projects than I finish.
So at the moment I have my personal domain, afonsoraposo.com, for my personal website and afonso.app for my projects/web apps.
Conclusion #
Building Traker was a great learning experience. I learned a lot about building APIs, working with Postgres, adding rate limiting to a project in a serverless environment, and so much more. It also made me reflect about the importance of choosing the right tech stack for the job and the trade-offs between using SaaS vs self-hosted solutions. The decsions I made are not the only ones possible, and I am sure that other people would have made different choices, but I am happy with the choices I made and the learnings I got from them.
You can try Traker here and, if you have any feedback or suggestions, please let me know! For now, Traker is a personal project that I use to track my cats’ weight and some other events in my life. I don’t have any plans to monetize it or make it a public service, but who knows what the future holds?
If you reached this far, thank you for reading! I hope you found it interesting and maybe learned something new. If you have any questions or want to share your own experiences, please do reach out.